“Getting to the top is optional. Getting down is mandatory.”
– mountaineer & author Ed Viesturs
There’s no denying the magic of a fresh coat of snow frosting the mountains, and it’s only natural that hikers want to trade trail runners for waterproof boots to explore these gorgeous alpine winter wonderlands. With the right tools, education, and experience, it’s fun to revisit your favorite places under completely different conditions. But if you don’t have those skills dialed in and if you practice poor judgment, a winter visit to the mountains can end with injury – or even death.
No matter how many times you’ve hiked an area in the summer or shoulder months, these same trails morph once the mercury drops, snow blows in, and ice slicks the ground. As evidenced recently in several incidents centered near Southern California’s iconic Mount Baldy, hikers have been hurt – and sadly, killed – along slippery slopes. We present the information below to offer a basic overview of the possible dangers and skills required while mountain hiking in the winter months – but we also acknowledge that this post barely scrapes the surface of the knowledge and experience you need in order to safely enjoy snow- and ice-covered terrain. We highly recommend you seek out courses that cover these tools and techniques in a controlled environment, and learn from people who are experts in the field.
COLD
Especially in places like Southern California, where outdoor enthusiasts famously have the option of surfing in the morning and snowboarding in the afternoon, it’s easy to underestimate just how cold it becomes once you ascend thousands of feet above sea level. There’s a drop in temperature (technically termed the “lapse rate”) of about 3.5°F for every 1,000 feet you gain in elevation. The summit of Mount Baldy, 10,066’ above sea level, is going to be at least around 35°F colder than Los Angeles – and will likely feel exponentially more frigid thanks to the wind chill.
The cold may not seem like a problem when you’re hiking, but once you stop, things can get dicey, especially if you’ve been sweating. This is where layering comes into play – you want to wear some sort of non-cotton “base layer” (that includes your underwear and socks) that will wick sweat away from your body; there are plenty of wool and synthetic options on the market. If you choose to hike in, say, a cotton shirt and/or jeans in winter conditions, you are putting yourself in serious danger – your clothes will not dry, causing you to become very cold once you stop moving, which can lead to hypothermia. When you take a break on a winter hike, add a “mid-layer” to help insulate you – fleece, down, and synthetic down are common materials. A shell layer (i.e. a Gore-Tex jacket or similar) will further protect against wind and precipitation.
Danger from cold increases exponentially if you’re unexpectedly stranded after nightfall, when the temperature plummets. Not only will your water and batteries freeze if the temps get low enough, but your body will also slide into shutdown mode. This is one of the reasons it’s always best to not only carry a full layering system (including gloves and hat), but also an emergency blanket.
SNOW
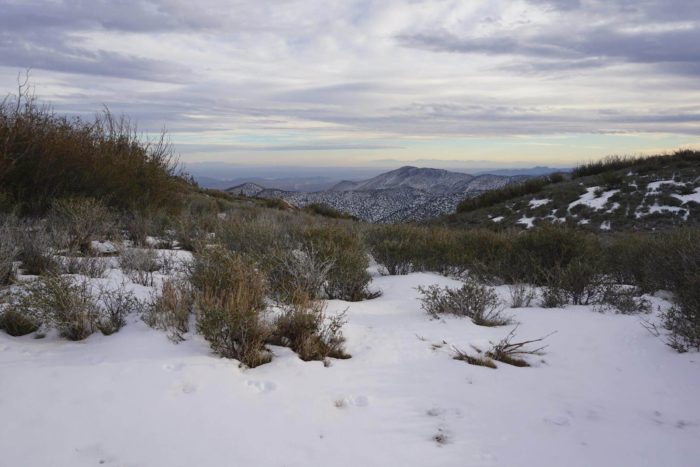
In my mind, there is almost nothing as beautiful as a snow-capped mountain, but its important to know that the experience of playing in alpine snow is very different than it is in flatter terrain. Some snowfall can be light and powdery, which may present a problem to hikers because it can be slippery to walk on (especially if it’s located on granite or slickrock) and not thick enough to require traction devices (see below) – good, grippy tread and lugs are a must on the soles of any shoes or boots you choose to wear in this type of snow.
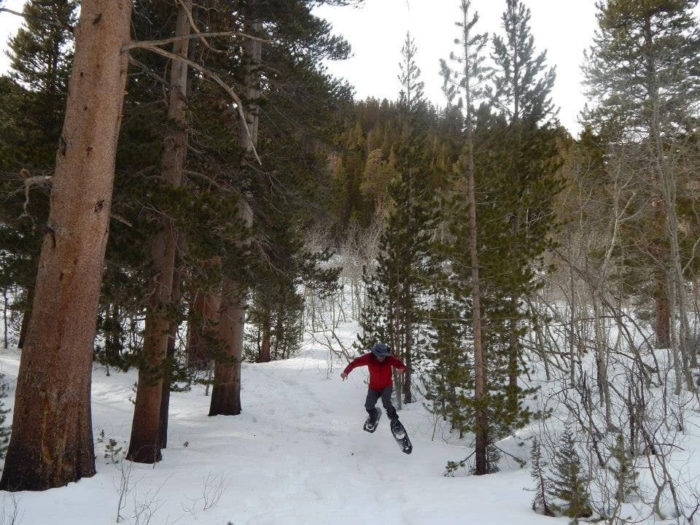
As the snow deepens and gets packed down, it becomes consolidated and forms layers. In sunny areas (or during warm spells), the top layer may melt – only to refreeze at night to become extra hard and slick the next morning. When the snow is soft, you risk having to walk through “sun cups” (egg-carton-like depressions on the snow’s surface that love to turn ankles) and you experience “postholing” – punching through the softened snow’s crust as you hike. It might look funny when your friend is buried up to his waist, but it’s less so if he cuts his leg on something obscured under the snow when he goes down. Snowshoes are helpful in soft snow, since they spread your weight out over a larger area, and adding “snow baskets” to your trekking poles acts similarly to keep them from plunging all the way through. Many people time their hikes for early morning to avoid dealing with slushy snow.
As mentioned above, deep snow can mask potential obstacles below – from rocks and branches to running water covered by a “snow bridge.” This is where being familiar with the area – and knowing where you are on the map – can be helpful, since if you know you’re approaching a creek crossing, you can prod and test the snow before crossing to see if the bridge collapses underfoot, or if it will support your weight. Tree wells create another danger zone, one skiers are well acquainted with. The warmth created at the base of trees is enough to cause snowmelt and form a depression that may trap unsuspecting passers-by, especially if it’s hidden beneath the tree’s boughs.
Another issue with snow is that it can completely obscure your intended trail. Do not venture into snow-covered territory without a map and compass – and the skills to use them. While most hikers carry a compass, it does absolutely nothing for you if you can’t use it – and similarly, a map is useless unless you know how to interpret it in relation to your surroundings. Many people carry a GPS or wear a GPS watch – these are only as good as their battery power (and satellite signal).
Finally, if you’re hiking in alpine areas with steep slopes, you need to be absolutely aware of the predicted avalanche danger for those areas and know how to spot avalanche-prone slopes using a clinometer (a feature on most trail-appropriate compasses) and a practiced eye.
ICE
Whether it’s from rain or snowmelt (and subsequent refreezing), ice is a considerable hazard in the mountains, especially in areas with steep drop-offs and thin trail – and where it may be hidden under snow or as nearly invisible verglas (or black ice) over rock.
Do not head out to “hike” in steep, icy mountainous areas unless you have the experience and tools to do so safely.
Traction devices are one of the key tools that allow for safer (read: not failsafe) passage through icy areas, with features on the bottom meant to grip the ice or hard-packed snow; carry appropriate ones along if the conditions ahead might dictate, even if the trailhead itself is clear of snow and ice. DO NOT wear minimalist devices (i.e. Yaktrax) into the mountains – these are meant for urban use and for trail running in flat territory. The next step up is a midlevel device like Kahtoola’s MICROspikes or Hillsound’s Trail Crampons – these generally feature a rubber rand that you slip over your shoes (including trail runners and low-top hikers) with small metal teeth along the bottom that provide a slightly beefier grip. “Spikes,” as they’re called, are useful in mild terrain with some well-packed snow crust to bite into, but will not provide adequate traction on slick, steep, hard ice.
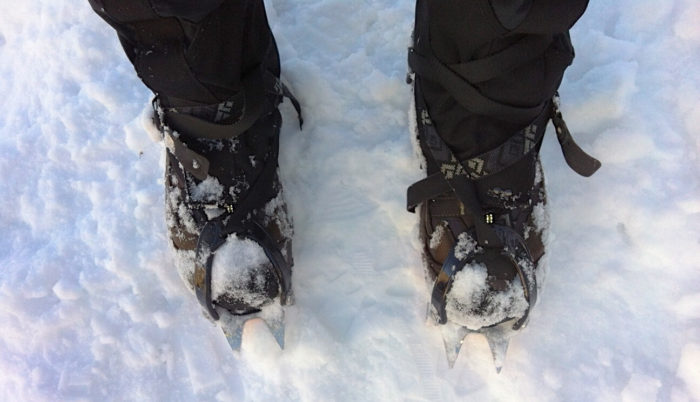
Crampons – which feature not just longer, sharper points beneath, but also in front – strap onto your footwear (some require compatible boots; some are more universal) and will provide the best grip on solid ice and in steep terrain. Most “true” crampons will also feature some sort of anti-balling plate underneath so that snow doesn’t build up and render the points useless. It is especially important to be cautious when carrying and wearing these, as they are typically quite sharp – learn how to fit, adjust, and handle crampons before using them in icy, steep conditions.
In steep, slippery terrain, it is also advisable to carry a helmet and an ice axe (different from an ice tool used for climbing), an object designed to provide a brake for glissading down snow slopes, as well as a self-belay or self-arrest to stop you from sliding out of control in icy conditions. While I won’t review any of these here, all of these techniques should be learned and practiced under a watchful eye, on low-angle slopes free of dangerous runout, before use in steep mountain terrain. Watching videos online is not a substitute for proper instruction. Once you learn how to use an ice axe, remember that it is only useful if it is in your hand, not lashed to your pack.
A NOTE ON RESCUE
Every time the news reports a helicopter rescue in the mountains, a debate resurges about personal responsibility, and whether or not those plucked from the slopes should pay for the Search and Rescue and other services involved. A parallel debate usually emerges about the role of cell phones and Personal Locator Beacons (PLBs) like SPOT and Delorme inReach devices, that provide not just a link to the outside, but also a “panic button” of sorts.
Here’s the thing – accidents happen to highly skilled mountaineers, just as they do to those with less expertise. Of course, the more experience and practice you get with winter travel in the mountains, the less likely it will be that you end up stuck in a seemingly inescapable situation that requires rescue. However, it’s important to remember that a PLB is not a “Get Out Of Jail Free” card – you should never attempt something above your skill level with the thought that if you fall into trouble, a helicopter is just a pressed button away. While most devices allow friends and family to track your moves, and some even allow you to check the weather and text, they (along with cell phones) should not be considered a substitute for being prepared, but rather a tool to use only in a true emergency.
EDUCATION
If you’re interested in playing in the mountains during the winter, education is key. Here in Southern California, a course like the Sierra Club’s Wilderness Travel Course is a great start to learning and practicing not just basic snow travel skills, but also to dig into related topics like navigation (disclosure: I am an volunteer instructor for this course). Sierra Mountaineering International also offers extensive courses covering everything from ice axe and crampon use to avalanche education. Hikers preparing to set off on the Pacific Crest Trail may find Mountain Education’s courses highly useful – they often offer special classes right on the trail in the Sierra for the current year’s trekkers. Nationwide, you may consider looking into courses offered by REI, NOLS, and guide services local to the area you’re planning to travel within.

A FINAL WORD
When you have the tools, skills, and experience, you can have an absolute blast exploring the mountains during the winter. However, if you’re feeling unprepared or uneasy in the terrain, turn back. If you forgot a crucial piece of equipment at home, turn back. If you are hiking in difficult terrain with someone who is not prepared, turn back. If you are comfortable with the ascent, but worry that you will not be able to descend, turn back. If your gut tells you to turn back, turn back. The trails and mountains will always be there – and you want to make sure you’ll be here to enjoy them the next time around.
Tags: cold weather, crampons, ice axe, microspikes, snow hiking, snow travel, snowshoeing, winter, winter hiking, winter mountaineering