Mountainsmith’s Mountain Shelter LT is a 2 person, 3 season tarp shelter that sets up using 2 standard hiking poles and provided stakes.
I used it on a backpacking trip in the Eastern Sierra mountains in California.

First let’s get some expectations out of the way. This type of a “tent” is of the tarp shelter variety so does not come with a floor. It is also designed to be set up using stakes and available support poles – mainly, two standard hiking poles (though you can tie the high points of the tent to a tree if you find one nicely situated).
My experience with lightweight shelters include: Sleeping directly on the ground, bivy sacks, tents with no rain flys, and using a similar tarp shelter which utilized hiking poles. So when I heard about the opportunity to test this tent, I thought I’d go ahead and make the leap of using it on an Eastern Sierra multiday backpack trip – even though there was a chance rain.
My nod to “what if it doesn’t work” was to purchase a piece of Tyvek to use as flooring (and as a footprint for another tent of mine that didn’t come with one). If the Mountainsmith Shelter had a catastrophic failure I figured I could still use the Tyvek. In my experience with the other hiking pole tent, I was most worried about wind, rather than rain. I spent a sleepless and dusty night in a tarp shelter before, with the wind whipping the tent sides loudly as strong gusts took the area.
I also worried about suitable ground. The sleepless tent night had included having to use climbing gear to secure point of the tent down, as the ground was too hard for stakes.
So how did the Mountainsmith Mountain Shelter LT Tent actually perform?
Quite well, in fact!
Tent Set Up

The first night I used the tent was in a campground. I found having set up directions printed on the carry sack to be invaluable. Following the directions I laid out the tent without too much consulting and proceeded to stake the corners in the order suggested. All went well, then it was time to put in the hiking poles. It was a stroke of genius to have a diagram printed on the tent itself of how long the poles needed to be. I was able to adjust the lengths then duck under the tent to set the first pole, which was just the right height. In my previous hiking stick as tent pole experience, I had had to guesstimate the height and then adjust in situ. All was going well and I was in the home stretch until I tried to do a few more stakes and managed to create a bend in the stake. I was using a rock to pound in the stakes – simulating a realistic situation where I wouldn’t be carrying a mallet, and managed to bend the head of two stakes. This is in typical Sierra conditions: ground not too hard, but with hidden rocks just a few inches below the surface. I managed to hit one of the rocks. The second stake I bent, while attempting to get in nearly flush with the ground. Luckily one of my fellow campers loaned me some of his heavier stakes to use.
In Use
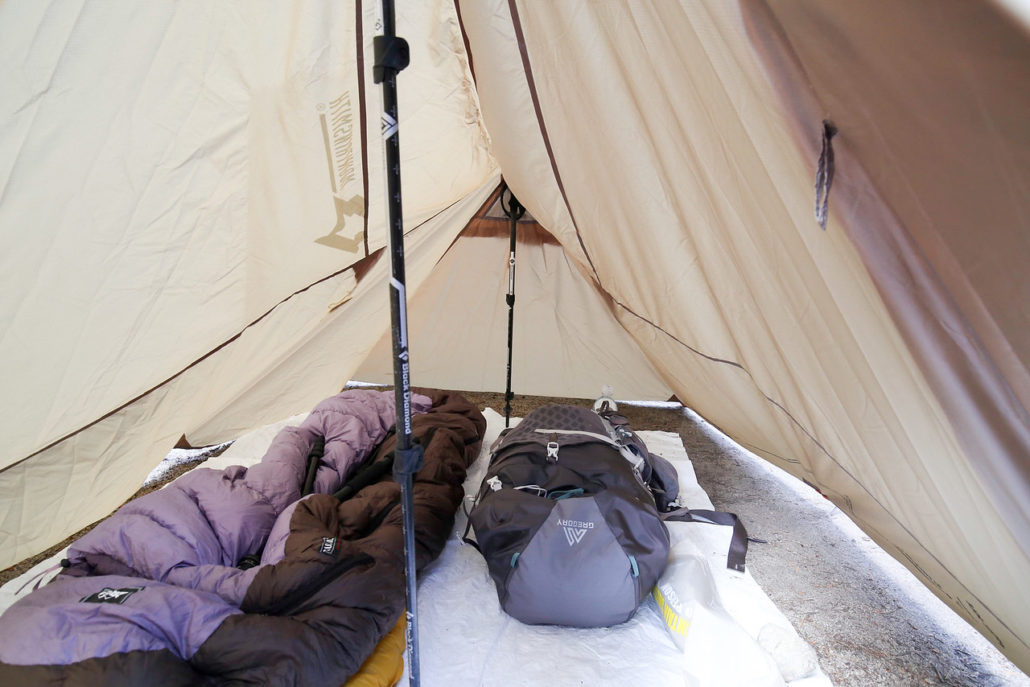
After tent set up, I was surprised at how much room I had inside. I guess I shouldn’t have been, since it was advertised as being for two people, but we all know some two person tents, aren’t realllly for two people, right? This one had room on each side of the support hiking sticks to house an adult with some room for a pack as well. Since I had the tent to myself, I was able to house my pack and spread out my extra gear in such a way as to make it convenient for me. In the campground, and later at our backpacking basecamp, I was happy to find that wind did not whip under the tent sides. My Tyvek “floor” of course did not connect to the tent, but between it and the tent, I managed to keep the majority of dirt and dust outside my area.
Temperature-wise, I found the tent performed well. I didn’t get too cold or hot, and frankly think I would have felt the same temps in my REI Half Dome tent. The forecasted rain did not arrive, so I can’t comment on that.
A really nice feature of the tent, especially if you do night photography like I do, was its reflective tabs and reflective stake lines. Nice when you need to find your tent in the dark, and when you don’t want to trip while walking around it.
Alternative to a Hiking Stick
I mentioned night photography, well I had indeed brought a tripod with me. This came in handy during the day when I wanted to do a 16 mile, 2000 foot elevation gain day hike but still wanted my tent to be up. I simply adjusted my tripod to the appropriate height (consulting the handy printed measuring guide) and then – Indiana Jones idol swapping style – replaced the shortest hiking stick with the tripod! Ok, I didn’t do it with quite the smoothness that Indy did, but I did do it without having to adjust anything else in the tent. Hiking stick in hand, I then went off to hike fearlessly up and beyond Mono Pass, traversing over some snow patches, using my newly freed hiking stick.
Conclusion
Currently going for less than $100 retail, this tent is a great buy for ultralight needs, especially in moderate or hot weather. It packs up easily and you’ll really like the space and weight savings over a traditional tent. While I managed to bend two of my stakes, I feel I could have avoided that if I had probed a little more carefully. But, with the weight (and money) savings, you could buy and bring a couple of burlier stakes, just in case.
Tags: mountain shelter lt, mountainsmith, Review, tent, ultralight